Saturday, May 29, 2010

The Rebel House + Summer's


When the sun refuses to sleep and your shoes are traded in for flip flops, it can only mean one thing - patio season is in.

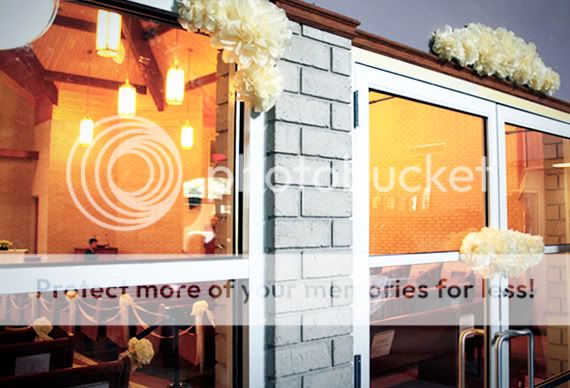
The weather in Toronto has been incredibly warm lately, and after a long, grey winter, I'm more than happy to welcome in the summer sun. On Friday, I hit up the backyard patio at The Rebel House with Winnie and Mike. Located just north of Rosedale station on Yonge, The Rebel House has been opened for 17 years and is a popular destination for locals to go for drinks and munch on generous portions of quality pub fare.

Photobucket

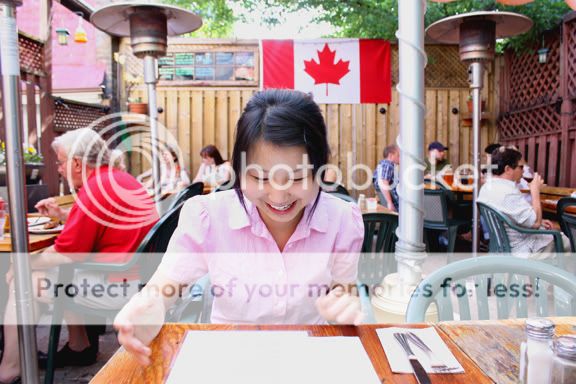
Inside there is a fantastic classic yet rustic rustic looking bar front that's perfect, while the backyard patio is strung with Canadiana decor and shaded by giant translucent umbrella. They were quite busy but we managed to snag a table.

Photobucket

As Winnie and I waited for Mike to arrived, we ordered the Rebel poutine ($6.75). I rarely think you can go wrong with poutine, and with the name tacked on it you'd think it'd be an awesome signature item - sadly, not the case here. Upon arrival, it looked really interesting and I was excited to dig in. The "fries" were cut more like thick-cut chips, and although tasty, didn't hold the cheese properly and got soaked by the gravy way too quickly. The homemade gravy also had a funny taste - Winnie remarked that it had like a beer-like aftertaste. Oh, well.

For l'entree, I got the daily mussels ($12.95), Winnie got the daily chef salad ($10.75), and Mike got the buffalo burger ($10.95).

Photobucket

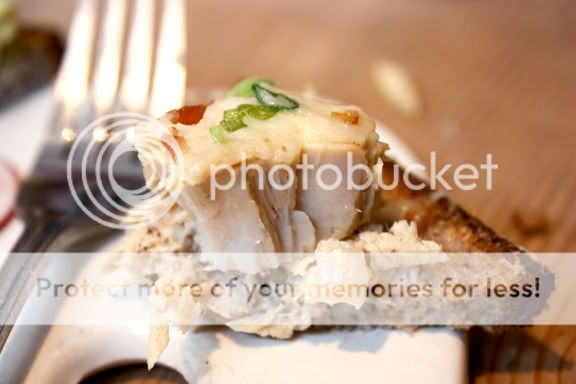
The mussels were cooked in a garlic-cilantro broth and served with rye toast. They gave me A LOT of mussels - over two and half dozen? They were hot and fresh, with the garlic-cilantro flavour quite interesting (although a little overpowering). I thought the rye toast was a bit of an odd throw-in. Rye bread naturally has a distinct and strong flavour, and it didn't really go with the mussels. I was craving some crusty Italian loaf instead to dip into the broth.

Photobucket
Photobucket
Photobucket

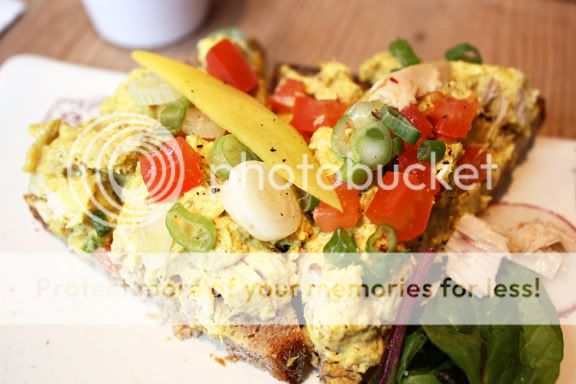
Winnie's salad came with organic spinach, honey-roasted mushrooms, goat cheese, ham, tomatoes and cucumbers in a orange-ginger dressing. For a restaurant salad, I was surprised at how decent it was (no, I'm not being critical. It's just that most restaurants just don't know how to do salads). The spinach was the star of the dish as the leaves were extremely fresh... tender-crisp and almost thick. Although I was sort of hoping for shreds of real ham hock, we got diced up bites of cold-cut ham (cut too small to be able to jab easily a fork). The dressing was really light and refreshing, and they didn't drench the salad!!!!! Hurrah!! Just for that, I give the salad a thumbs up.

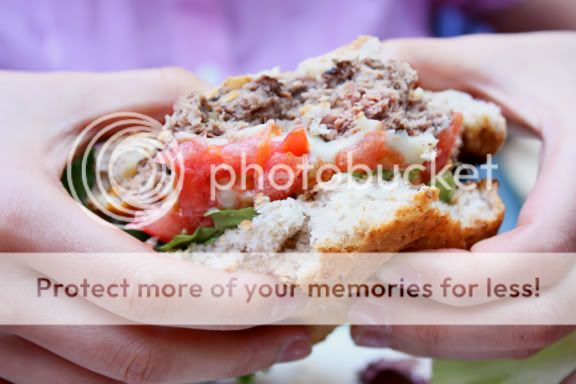
The buffalo burger, claimed to be "the best buffalo burger in town", was also quite good. I'd never tried buffalo meat until then so I didn't really have anything to which I could compare it. It definitely has a distinct, gamey taste that I'm not quite sure I'm fond of. But for buffalo-meat lovers, I think it's sure to please. You can tell the waiter how well-done you want your burger cooked, and it comes on a whole wheat bun with a spicy ancho pepper sauce that gives it that BBQ kick.

Photobucket

Randomly enough, I think the best thing I tasted there was the iced tea Mike ordered ($2.75). We were expected generic Nestea, but was surprised by a homemade iced-tea. It had a slightly bitter/medicinal taste with notes of honey that left your tongue puzzled, yet craving more. Not to mention that it came in a glass mason-jar with s handle, which made me swoon just a little (Hey, I'm a designer, after all).

Photobucket

After dinner, we took a walk around in the Rosedale neighbourhood to burn off the poutine and to covet the gorgeous, gorgeous Rosedale homes. And then it was off Summer's in Yorkville. Being a Friday night with the weather so nice, it was booming in Yorkville and the doors of the little independent ice cream shop were crowded with loads of people. I was entranced by the warm scents of fresh waffle cones as we walked in. We ordered the chocolate chip cookie dough and mango-raspberry sorbet to share. ($3.50 single scoop with waffle cone)

Photobucket
Photobucket
Photobucket

Now sorbet has never really had a good reputation, as most of the ones that exist out there are reminiscent more of melted freezies rather than pureed fruit.

But Summer's mango-raspberry sorbet? HOLY CRAP. One bite each and the three of us were looking at each other thinking oh-my-friggen-goodness. It was... amazing. The intensity of the fruit sweetness cuts through to your tastebuds like a little piece of icy fruit heaven. It was like taking a shot of concentrated fruit smoothie with smushed chunks of raspberries, all wrapped together in a fresh waffle cone...I mean... just, just go get one. Seriously, now.

The chocolate chip cookie dough was also very good, with the vanilla ice cream part tasting especially creamy and fresh. I liked it better than the vanilla at Greg's (Greg's I find to be too creamy). But I think we were all too entranced by the sorbet to really pay attention to it.

It was a great way to end an eventful night. Oh yeah, after the ice cream, we walked down Avenue Road and were held up by security guards who were holding up the entire street - traffic and all. We watched as the prime minister of Israel along with his bodyguards and associates walked from the hotel to the restaurant across the street. It took about 8 minutes total and there were a lot of annoyed car honks, but it was pretty interesting to watch at how intense it was - as if they were parting the red sea for him!

Friday, May 28, 2010

The Wedding Cake: Part 2

Photobucket

Thank goodness for afternoon weddings. On the morning of, we woke up at 9am to get ready as the ceremony was set to start at 1pm. As Martha Stewart would say, that's a good thing - considering the fact that we hit the hay the night before around 3am. Unfortunately, I was still churning the thoughts of worry throughout the night. What if the cake flops in the car? How exactly am I going to pipe this thing? What if I screwed up? What if the cake starts melting uncontrollably and it ends up as a giant cake puddle that everyone will have to eat with a spoon? What if... um, well, you can imagine how wired I felt when it was time to get up.

Photobucket

For that morning however, I had some other things to think about besides my awaiting-cake and my dark circles - there was the matter of the pom poms. Yes, that's right. Fluffy, poofy, scrunchy pom poms, all lovingly handmade by Mike (another fellow designerd), James, and yours truly. After several hours of folding, cutting, tying, and poofing while watching the Ellen show, we managed to make two garbage bags full of different sized pom poms that were requested to put up as decorations on site a.k.a the morning of. So as I rushed out the door with garbage bags in hand, cake on my lap, and praying that we don't make a sharp turn, I'm thinking that we probably should've seen the ceremony site beforehand to know what the heck our game plan was going to be. Alas, I think they turned out quite nice in the end, no?

Photobucket
Photobucket

Their church, by the way, was really gorgeous. Exposed grey brick with wooden beam ceilings, and brilliant pendant lamps hanging scattered across the sanctuary. It was a beautiful setting fit for a beautiful bride, and as Jess walked in to meet her groom, she looked stunning. Jess is the first of my friends in my age group to get married, so it was pretty dang exciting to watch. I think I was just grinning the whole time, she looked sooooo happy!


After the ceremony, we hiked up to Newmarket to set up the decorations at the banquet hall. So I think when a bunch of designers get together, you really can't help but end up with a branded wedding. The centerpieces themselves was totally a collaborative project. Jess and Eric actually grew pots of wheatgrass for weeks beforehand, appropriately reflecting their spring green theme. Winnie (winniema.ca), the bridesmaid who art directed the creation the bird toppers on my cake, created the menu and other matching stationery items, and Mike (miketjioe.com) had been running around at Ikea that very morning to buy branches for the table numbers he had made. He also put together a photobooth at the reception where everyone could take photos with wacky dollarstore props (the elderly adults got really into it). It was pretty awesome to see all our creative minds come together in a mutual effort to make our friend's day really special :)

Photobucket
Photobucket
Photobucket
Photobucket

I was really pleased with how the layers turned out. Although green tea layer was darker and more brownish than green, it still came out in a pretty striped pattern.

It was a long, hectic, but celebratory day. I can't wait till the next chance I can make another wedding cake! In the meantime, congrats again to the happy couple!

Photobucket

Saturday, May 22, 2010

The Wedding Cake: Part 1

Photobucket
Ah, young love. And what better way to celebrate... than with cake? A wedding cake!

Congratulations to Jess and Eric! This past Saturday I witnessed, Jessica - a fellow design nerd and friend who I met through university - walk down the aisle and be wed to her longtime sweetheart, Eric. It was the sweetest wedding that perfectly complimented the couple themselves. To top it all off, I had the honour of making their wedding cake in celebration of their big day! It was my first time making a wedding cake, and I was thrilled to have the chance to put my cake-making skills into real world (wedding) action.


It was a collaborative project, with Winnie (a mutual design friend) art directing her talented aunt to make the gorgeous bird wedding toppers, and myself making the cake. Needlesstosay, this cake would not have been able to happen without the HUGE help I got from some very key people: my dad (shopper of groceries), James (personal assistant, cake transporter, and skilled dowel-cutter), and my mom (the ultimate cleaner-upper who saved the kitchen from becoming a complete minefield). Thank you all so much! Thanks also to Susie and Andrew Yang for letting me store the cake at their beautiful new home, so we would've have to circle back and forth commuting.

So was it hard? Yes. Was it time-consuming? Yes. Was it fun? Yes. Would I do it all over again? Definitely, yes!

Photobucket

The inspiration for the cake came from Jess' custom made wedding invite, which she, of course, made herself. For those of you who don't know, Jess is a mega-super talented, detail-orientated, crazy hard working designer who seems to be able to churn out jaw-dropping, meticulous designs on very little sleep. She has won numerous awards from Adobe and Applied Arts, and rightly so. I've always been amazed and inspired by both her work and her work ethic, and often like to shamelessly promote her amazing skills, since she is too modest to do so herself. :)

Photobucket
PhotobucketPhotobucket

Isn't her invite gorgeous? From the perfect hand-lettering to the cute bird motifs, it was so creative and so very "Jess". Her theme was appropriately based on the verse Ecclesiastes 3:1-7, "A Time for Everything", as she and Eric had met through church and had been dating for a long, long time, since early high school. For more amazing Jess work, visit her portfolio site here: http://www.jessatwork.com/

The couple had requested a green tea flavoured cake, which was perfect, seeing as their wedding colours were light pastel green and yellow. Based on the details of her invite, I sketched up plans for a two-tier wedding cake that would alternate layers of green tea and vanilla cake, with a cream cheese filling and a vanilla buttercream exterior.

PhotobucketPhotobucket

So, that was uh, the initial plan. Did it follow through? Nope. Not exactly. It was my first time creating a tiered cake and I would be lying if I said that I knew what I was getting myself into. Did it turn all right in the end? Thankfully, yes. Perfect? No way. But it tasted awesome and was so well-recieved at the reception, and by Jess and Eric that I was practically beaming the whole night away. That being said, I learned a few key things along the way...

Photobucket

Lesson learned #1: Plan, plan, plan. Holy moly, I can now never underestimate the importance and critical value of planning and preparing in advance. My usual spontaneous, impromptu cake-making self took a hard hit when I hit a few planning potholes. Note to self: Take considerably more time beforehand to figure out exactly what I need, when to get it all, when to bake, how to transport, where to store, and so on, to prevent last-minute freak-outs, anxiety attacks, and under eye-baggage.

Photobucket

Lessons learned #2: Make a test cake. Um, so although this sounds like a no-brainer, I am guilty as charged. One of the main issues I had with the cake was the frosting. The issue was that I needed a buttercream that would taste good (not too sweet), pipe well, and be able to sit at room temperature for at least half a day. My attempt to make a swiss meringue buttercream a few days prior did not go over well at all, so I settled for a cooked milk-and-flour buttercream instead that I made on the night before, thinking it would work fine. This also refused to cooperate and left me with a watery mess and unsightly air pockets. *pulls hair out*. Lucky for me, I managed to fix my consistency issues by mixing together the buttercream frosting with the cream cheese one.

Photobucket
Photobucket

Lesson learned #3: Do your research. So who knew that cardboard cake rounds could cause so much grief? You see, the base of the cake tiers are supported by cardboard rounds that sit on wooden dowels inserted into the cake. I somehow either managed to buy rounds that were too big, or did not put enough frosting on the sides of the cake to match the size. I also got very, very confused with the top tier, ended up making the wrong cake size, and had the base poking out from the bottom. To top it all off, the cardboard was too thick to be able to pierce with the central dowel! Baaahhhhhhh... Well, somehow I managed to fix all the issues, but next time, I will just do my research before hand and buy the proper cardboard rounds!

The cake making process took place over a span of two days, as decorations would be piped on site at the reception hall. It was a long day of baking, stacking, icing, and doweling, and I went to bed that night exhausted yet happy.

Tuesday, May 18, 2010

Le Pain Quotidien

Photobucket

Since I started working downtown, I'm finding myself eating out pretty often. It's just such a nice treat to be able to go out to a restaurant after a long day of work. Since I'm located in the heart of the city with a metropass in hand, it's pretty convenient too. I've already checked out a few gems that are on my favourites list, including Earth (best wood-oven flatbreads), Black Camel (best pulled-pork), and Toni Bulloni (best crostini), and my list of place to try seem to be ever-growing.

Photobucket
Photobucket

Yesterday, I visited Le Pain Quotidien, located just north of Yonge and Bloor across from the Toronto Reference Library. It's a franchise, but there's a lovely cozy charm about it. I've walked by this beautiful little place several times and have always been itching to go in. You can see the gorgeous wooden interior of the building through its tall glass windows. The ceilings are high and it has some great track lighting. It's actually quite a deep space - there's a take-out counter by the front with the walls piled with loaves of rustic, homemade bread, and a sit-in area that extends to the back towards where the kitchen is.

The bakery/cafe specializes in French style brunch and tartines a.k.a. open-faced sandwiches, which costs around $10-13. I didn't take a very good look at the brunch side of the menu it was six o'clock, so I settled for the chicken curry salad tartine while James got the rustic tuna melt.

Photobucket

Our tartines came out quite fast, but then again, there weren't that many people in the place. The presentation was interesting and pretty, and was served on ceramic white plates that reminded me of an artist's palette.

Photobucket
Photobucket


The rustic tuna melt was surprisingly good. Moist, huge chunks of tuna with a nice kick of horseradish and crispy real bacon bits. It wasn't gooped in mayo as most sad tuna sandwiches are. I'm pretty sure it was fresh tuna, judging by the huge chunks, but since I rarely eat tuna and thus have a unrefined tuna palate, I'm not 100% certain. Regardless, a definite win.

Not so with the chicken curry salad, however. It was disappointingly bland and dry, although it was served with a pot of cranberry chutney on the side, they didn't give enough of it and I had to ask for more. The chutney itself was awesome and I could tell it was homemade, but without it, the tartine was pretty tasteless. I ended up sprinkling my tartine with sea salt and loading it up with chutney. It was also supposed to come with "sliced mangos" - unfortunately I counted only one, paper thin, sad piece of a mango (see pic above).


Both tartines were served on slices of their multigrain bread. The bread was delicious but I would've preferred it to be slightly toasted - which I might ask for next time. Although the multigrain suited the tuna melt perfectly, it too heavy for the chicken curry.

Intrigued by the fact that the chocolate chip cookie cost a whopping $3.75, we decided to split one. It was pretty huge, bigger than the size of my hand. The chocolate chunks tasted rich and I could tell they were of good quality, but the cookie itself was nothing mind-blowing and not worth the price. I wouldn't get it again, although the other desserts that were on display do look more promising.

Photobucket

Overall, Le Pain Quotidien is a win. I'd definitely go back to try some of the other interesting tartines they offer. I left the lovely building just satisfied and feeling a little bit more French.

Tuesday, May 4, 2010

Quiche!


Quiche is an odd sort of food. It's not something people seem to eat, or make, or even think about eating on a regular basis. Unfortunately it seems to be underrated and I think more people should try it out more often. It's like an omelette. Only with pastry. And burnt cheese. I mean, c'mon people!

Okay, I kid. (Not really). To be honest, I was never very familiar with this savoury eggy pastry myself either, until I was in the eleventh grade and working part-time at a bakery (serving, not baking, to be exact). The bakery sold two types of quiche - broccoli and... I think it was either spinach or mushroom. I'm banking on the spinach. They also came in two different sizes - 9 inches and 3 inches. I would sometimes help myself to the 3 inch during my breaks, as it was perfectly proportioned for individual eating pleasure.


I've only ever made quiche twice before, and both were a bit of a fail. So needless to say, I was a bit hesitant to try again, but I was having a hankering to make sort of pastry dish, and quiche was the perfect excuse. Homemade pastry is awesome, and a homemade pie crust is just even more awesome. It's on a whole different level from taste-less, cardboard frozen pie crust, while still being surprisingly easy and quick to make. Once you've tried homemade, you just can't go back to the frozen stuff - the difference is unbelievable. A good pie crust recipe is really great to have under your belt. It's so versatile and you can use the same recipe for both an apple pie and meat pie (or in this case, a quiche!).


Butter Flaky Pie Crust
adapted from allrecipes.com. makes one 9 inch pie crust (double it for a lid).

1 1/4 cups of all-purpose flour, plus more for rolling
generous pinch of sea salt
1/2 cut very cold unsalted butter, diced into small cubes
2 to 4 tablespoons ice water


Combine the flour and salt in a large mixing bowl. Use a pastry cutter or two knives to cut in the butter to resemble coarse crumbs. Stir in the water, a tablespoon at a time until the mixture starts to come together.

Dump the mixture out onto a clean work surface and gather the pastry together with your hands, pressing firmly so that it sticks together to form a ball. Handle the dough as quickly as a little as possible, and DO NOT KNEAD. If you start kneading, you're going to end up with a chewy crust like bread. And resist the temptation to add more water. Don't worry your end product looks like a shaggy mess and you have bits of pastry hanging off - it's not supposed to look smooth and elastic. Note: The less you handle it, the more flaky it will be. You want to make sure you have little bits of butter spotted throughout the dough (when this butter melts in the oven, it will create little flaky pockets of air).

Flatten the ball into a disc, 1-inch thick and wrap in plastic. Refrigerate for 4 hours overnight. Or if you're like me and never manage to do these things in advance, stick it in the back of your freezer for about 30 minutes, flipping halfway. Check to make sure it doesn't get rock hard, or else you'll have to wait for it to thaw out again before you can roll it.

When you're ready to use it, sprinkle some flour onto your work surface and onto your rolling pin. Roll the dough out to fit a 9-inch pie plate. It'll be able 1/4-inch thick, depending on how much overhang you want. To transfer the rolled-out crust to the pie plate, roll it around your rolling pin and then unroll it over your pie plate. Trim off the excess with a pair of kitchen scissors.

Fold over the overhang, if you have any, and style. My pie crusts are generally very rustic looking, and I like to take some of the bigger leftover scraps of dough and stick them around the edges of the crust to maximize crust surface area. Now you're ready to fill your pie crust!

Note: Try to do this whole process as quickly as possible, and keep all your ingredients very cold. If your pie crust has gotten kinda soft and warm from working on it too long, just pop the whole plate into the fridge to chill up a bit.


The great things about quiche is that there is often no set recipe, and you can add in whatever you happen to have in your fridge that day. It's a great dish to bring to potlucks since it can be made ahead of time (it actually tastes better the second day). It cuts and serves up beautifully, and you can easily change the recipe to please either your meat or vege eating friends.

I was very pleased with how the quiche turned out, despite the fact that I had to use milk since I was out of heavy cream. The green asparagus just looks so cheerful and spring, don't you think? Look's like third time's a charm!


Quiche with Mushroom, Asparagus, and Havarti
adapted from The Cooking Adventures of Chef Paz. makes one 9-inch quiche

a 9-inch pie crust
3 eggs
1 1/2 cups heavy cream (I used milk)
1 cup havarti, cubed up really small (havarti doesn't shred well)
10 spears of asparagus
1/4 cup of onion, chopped
3/4 cup mushrooms, sliced
2 tablespoons olive oil
sea salt and pepper to taste


Preheat your oven to 375 degrees C and set a large pot of water on to boil (preferably a steamer pot if you've got one). Line your pie crust with pie weights or with aluminum foil and a handful of uncooked rice or beans. Prebake the crust for 20 minutes and let cool. Change the oven temperature to 325 degrees.

When the water is boiling, steam the asparagus for about 8-10 minutes until tender and brigh green. Season lightly with salt and pepper.

Heat the olive oil in a skillet over medium-high heat and saute the onions for about 5 minutes. Add in the mushrooms and continue to cook until browned, about another 8 minutes. Season with salt and pepper.

Take a large bowl and whisk together the eggs and heavy cream/milk. Stir in the havarti, onions, mushrooms, and a good pinch of salt and pepper. Pour the filling into the partially-baked crust, and place the asparagus carefully on top in a row, alternating the orientation. Pur the longer asparagus in the middle and the shorter ones on the outside (you might have to trim them to fit).

Bake at for 45 minutes. Insert a toothpick to check for doneness.